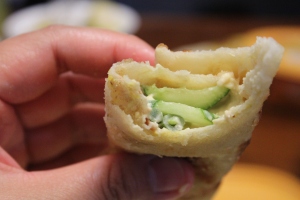
Chickpea Puri with green beans and heirloom tomatoes.
I love Dhal Puri. My mom used to buy it from an Indian store when I was younger and I always loved it with curry. It was one of those special foods that you only got when we had parties or when my parents felt like eating it. We infrequently ate it, but I really enjoyed it. Since I began eating a plant-based diet (all of a week ago), I’ve been brainstorming things I could eat. Then I remembered Dhal Puri. It`s amazingly easy, and will definitely be a staple in our house from now on. I`ll be posting my first version here but will update later with different, more “healthy” versions. I tried to stick as close to the original recipe as I could without modifications just to see if I could do it, but since I’m me, I modified it just a little. Next time I make this, I’m going to try substitutions such as; white flour with whole wheat and flax seed flour, or the dhal for hemp seed, or chia seeds. We’ll see how it goes 🙂
Chickpea/Garbanzo Bean Puri Recipe:
Filling Ingredients
1/2 cup dry chickpeas (soaked over night)
1/4 tsp turmeric powder
salt to taste
1/2 tsp roasted ground cumin
1/2 tsp roasted ground coriander seeds (I put this in because I love coriander seeds. It’s not in the original recipe.)
Puri Ingredients
250 g white flour
1/4 tsp salt
1 tbsp olive oil
1/2 cup water (the original recipe didn’t have an amount for water and I didn’t measure how much water I used. I’ll measure it out next time and update this recipe.)
2 tbsp canola oil for the skillet/non stick pan
Method:
1. Boil the chickpeas in salted water with the turmeric until the outsides are cooked but the center is still al dente.
2. While the chickpeas are cooking, make the Puri.
3. Put the white flour in a medium-sized mixing bowl or stand up mixer. Make a well in the white flour.
4. Add salt and olive oil to the well.

The dough is soft and a bit sticky. Put flour on your hands before you pull a chunk off of it!
5 . Put your mixer on medium and begin adding water slowly to the flour. You want a soft but workable dough. Do not over mix otherwise your dough will get very sticky. If you’re mixing by hand (which is what I did so I could feel the texture my first time around), place a wet cloth under your mixing bowl so it doesn’t move so much. Then, with one hand use your index and middle fingers to gently swirl the olive oil in a circular motion bringing the flour into the center. With the other hand, slowly pour in the water into the well while continuing to mix with the other hand. Remember, you want a soft pliable dough. All of this took me about 7 minutes.
6. Let the dough rest for at least 20 min.
7. The chickpeas should be cooked by now. Drain them and grind them. I used my magic bullet (with the 4 blades not the 2 blade), but a food processor would work just fine here too. You could also use a mortar and pestle if you have a lot of time on your hands 🙂

Chickpea mixture with ground cumin and coriander seed. I made a lot. It freezes well.
8. Add the ground cumin and coriander to the chickpeas. Taste and add salt if necessary.


9. Pinch a 3 inch ball of dough and flatten it a bit with your hands. Spoon about a 1/2 tsp of the chickpea mixture into the center of the dough. Take the sides of the dough disc and bring them together. You should have a closed ball.

10. Flour your work surface and the top of the ball. Roll out the ball to about a 1/4 of a cm. Some recipes say that you should be very gentle, but I wasn’t and none of my puri’s ripped or broke.

11. Heat a non-stick skillet with 1/2 tsp of oil. When the pan is hot, add the puri. Cook for about 1- 1.5 minutes and then flip. Cook for another minute and take off the heat. Repeat this process until your dough is finished.

Great way to get hummus, beans and cucumber into a toddler all in one go!

My little girl is a camera diva 🙂

I ate my chickpea puri with green beans, hummus, cucumber, and a vinegar garlic sauce that my mom used to make when I was at home. She probably still makes it, but I didn’t eat it very much until I started to eat Vegan.


I got these green beans from Costco. I steam two whole bags in one go, and then cut them up and stick them in the fridge so they’re ready at any time.
YUM!
Cheryl
Update: I made a double batch of the Dhal Puri again with Dhal this time. It didn’t taste any better or worse than the chickpeas. The only difference is that I didn’t have to soak the dhal (yellow split peas), which means I didn’t have to plan to make the filling.
I also substituted:
1/4 cup of flour for whole wheat flour
1/4 cup of white flour for a mix of ground flax and chia seeds

Dhal Puri dough with ground flax/chia seed and whole wheat flour.
My conclusion: Not bad but nothing beats the flavour and soft chewy texture of white flour. The Puri turned out a lot more dense and was almost crispy. The day after I made a double batch of the white flour dough so I could alternate healthier, whole wheat, ground flax/chia seed puri, for oh so good white flour puri 🙂 I can’t get enough of this stuff!

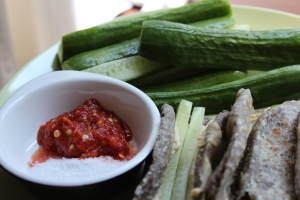
I ate them with cucumbers and hummus 🙂

Oh, and I had cucumbers on the side with chili and salt. Mmmmmmm spicy salt.
Yum 🙂
Read Full Post »
![PLAIN-ROLLED-OMELETTE-STEP5-8-BUSOG-[2]](https://cafeocheryl.files.wordpress.com/2013/08/plain-rolled-omelette-step5-8-busog-2.jpg?w=300&h=191)


You must be logged in to post a comment.