Feeds:
Posts
Comments

Posts Tagged ‘culinary’

This Pastelito is made with the spiced tea glaze but has a banana filling. So many options, so little time!!

Holy smack you lips and let the fat run to your hips delicious!!  I thought about changing the coffee ravioli dough to a Pastelito dough and boy was that a good idea!  The dough is a pain in the arse to make, but the results are flaky, light, and totally scrumptious.  This one is a definite keeper and can be modified to have a simple glaze with a coffee filling, or a coffee glaze with a fruit filling, or, or, or…there are just so many combination’s to be made!  You must be wondering why I have a TEA glaze instead of a coffee glaze.  A couple of days ago, I was walking with my friend Min, and she made a comment about whether I liked coffee or something like that.  Then I realized that I actually like tea a lot better.  My taste buds are in tune with tea a lot more than coffee, and so every time I make something with coffee, it just tastes like…coffee.  With tea, I can taste the subtle or not so subtle differences between good, bad, oxidized, and non-oxidized leaves.  So, in response to our conversation, I decided to include tea flavours in my experiments.  Most of the recipes I’m going to experiment with will be adaptable for either coffees or teas, I hope.

Anyhow, here is the recipe.  I’ll include pictures later on in the week.

Dough

2 cups all-purpose flour

1 Tbsp sugar

pinch salt

3/4 cup melted butter

lukewarm water

Glaze

1 Cup sugar

1 Cup water

1 Spiced Tea bag

Glaze Directions:

Add sugar and water into a heavy sauce pan.  You can stir the sugar to initially help it dissolve, but don’t stir it after you’ve put it on the heat.  When the mixture starts to boil, reduce your heat and let the mixture simmer until it thickens a little (about 3-5 minutes).  Add the tea and let it simmer in the syrup for about 5 minutes and then take it out.  If you want a stronger tea flavour, you can put the tea bag back into the syrup once you remove the syrup from the heat and it has acquired your desired consistency.  The syrup should not get to the ball soft stage of candy making but should lightly coat the back of a spoon.

Dough Directions

A)In a large mixing bowl, mix the flour, sugar and salt.

B)Make a well in the middle of the flour mixture and pour in 12 tablespoons of the melted butter. (Try to use as much of the  butter cream at this stage rather than the clarified butter that rises to the top as you’ll only want to use the clarified butter later on.)

C) Slowly incorporate the butter into the dough by moving the butter around in circles in order to pull in a bit of flour at a time.

D)  If you notice that the mixture is too dry, add 1 tablespoon of water until the mixture comes together into a dough.  The dough should not be wet or sticky.

E)  Knead the dough until it comes together as a smooth mass.  Leave to rest for 30 min in a cool area.

F)  Cut the dough into four segments.  When working with one segment, cover the others so they don’t dry out.

G) Now comes the hard work (unless you have an electric pasta maker!)  Take one segment of dough and roll it out to about 3 mm thick.  Brush with clarified butter and lightly sprinkle with flour.  Fold in half and roll out again to about a 3 millimeter thickness.

You don’t have to be super picky about the thickness.  I had a sheet that was about 6 mm thick and it turned out just fine.  With that being said, I liked the thinner pastry better because it fried up thinner and made it easier for me to get it in my mouth 😛  Anyhow, this is what it looked like.  Oh by the way, the one on the left is a nickle…just in case you didn’t know 🙂

Repeat this process about 4-5 times.  Do this with each segment.  Then refrigerate for 30 minutes. Try to make your dough have even edges as this will help with your cutting later.  It will help you waste less dough in the final stages.

This is what the dough should look like.

This is what the dough looks like all prettied up, trimmed and divided into 7 cm squares.

H) Now comes the fun part!  Cut the dough into about 7 centimeter squares.  You could make smaller squares (I cut my first batch into 3.5 centimeters) but you get to eat less filling and more of the dough.  I like the dough a lot more so this was a good option for me!  Each Pastelito will use two squares.  Brush one square with water, on the other, put a small mound of whatever filling you want.  My husband is from Argentina so he prefers to have quince or dulce de batata, but since i didn’t have any of those, and a friend of ours made homemade Nutella, so,   I used Nutella.  Place the dough (water side down) on top of the dough with the filling , making sure that the second square of dough is at a 45 degree angle from the dough with the filling.  The product will look like a star. Pinch the edges of the squares up towards the filling creating a “flower” like presentation.

Here’s one edge pinched.

Here are ALL the edges pinched!! Yippee!

I) Deep fry the flowers and submerge in the simple syrup.  Cool on a rack and enjoy!  You could re-submerge the flowers into the simple syrup after they’ve cooled in order to get them really gooey and yummy.

Here they are when they come out of the oil.

And this is them with all their Ooey Gooey Syrupy Yumminess!

This recipe makes about 8 fairly large “flowers” at 7cm.

I’m going to try this out with my coffee glaze and maybe some oven baked grapes for a filling…or bananas!!  The dough freezes very well so if you’re up for it, make big batches and freeze the dough for whenever you need it.  This dough bakes at 350C for about 10-15 min, but it fries up in less than 5 minutes.  I liked the flavour of the baked version, but really, fried is so much more decadent.  The best part was frying up all the trimmings!! My little girl munched on them with a great big smile on her face.

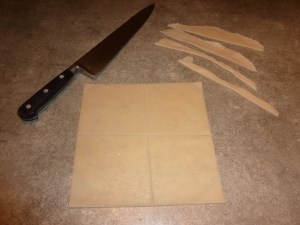
I couldn’t resist, here are the trimmings!

Cheryl

Read Full Post »

Let’s try this again…

Here’s a little background on me.  I’m a mom of a lovely 16 month old girl.  A wife of a man who has the patience of the Dalai Lama, am a graduate student, and although I have both the education and the experience to teach the English language to adults, I’m working as an English Language Educational Assistant in an elementary school.  I could write pages upon pages about ESL and why people like me end up in low paying jobs working under people who have less experience, less education, and less care for their students, but this blog isn’t about ESL, policy or politics. This blog is about coffee, or rather, foods with coffee as an ingredient.

Since I can remember, I’ve always liked being in the kitchen.  I really enjoy cooking, but I love baking.  I find it therapeutic to cook and/or bake.  I enjoy the process, the organizing, and the sometimes monotonous tasks that cooking brings.  I like to roll out dough until it’s just the right thickness, pipe out choux pastry balls until I get just the right size, dice celery to get the perfect little cubes, and silliness like that.  I like making food for people and watching them enjoy the food I’ve put out.  I have to admit that the enjoyment I get from making people happy is not purely selfless.  I get that ego boost every time someone says, “…but (insert name here) is so picky, I can’t believe they ate all your food!  Can I have the recipe?” or ” Thank you for the great meal! “.  Because I enjoy being in the kitchen so much, I figured, why not try to make a living out of it?  Don’t get me wrong, I love working with the elementary kids, I really really do, but it’s not a career.  I hardly make ends meet with that job, and when I’m finished my graduate studies, there’s little hope that I’ll be able to find a job making much more in ESL.  With that being said, opening my own business selling baked goods would be so much more promising.  This is the reason for this blog.

My goal is to start a business in one year.  I’m not aiming to own my own catering business or open a restaurant or a cafe.  My goal is to create 12 dishes/desserts that include coffee as an ingredient by Jan. 1st, 2011, and sell those dishes/desserts with a steady income by Aug. 15, 2011, all while finishing my thesis by the spring of 2011, and work full-time.  I haven’t figured out how I’ll begin selling my foods to people yet, but that’s all a part of this learning process.  Subsequently, I want to learn about coffee.  I want to work with it to see how it can compliment other flavours.  I want to use it in sweet and savoury dishes.  I mostly want to document my recipes, my successes, my failures, my experimentation, and most of all, my process throughout this year.  One wise woman said, “..ain’t about how fast I get there, ain’t about what’s waiting on the other side, it’s the climb.”  Well okay, she isn’t wise, nor is she a woman…yet.  Nevertheless, Miley Cyrus’s “The Climb” has a damn good message! If this business doesn’t work out, then at the very least, I’ll have learned something, and my friends and family will have gone on a coffee tasting ride that I’m sure they won’t regret.

So, Day 1 is here, and my first recipe was a Deep Fried Coffee Ravioli with a Chocolate Ricotta filling.  Before I begin, I have to say that this recipe came about because I happened to have ricotta in the house.  Ricotta is pretty expensive here and it’s not expensive to make, so…I made it.  Now why would I make Ricotta you ask?  My little girl LOVES Ricotta.  There was a time that it went on sale and so I bought a tub of it.  I ended up putting it in everything.  I mixed it with rice and Parmesan, pasta and Parmesan, spinach and pasta, cinnamon and nutmeg, hummus, etc…  She even ate it straight out of the container.

Back to the deep fried ravioli.  I had Ricotta in the fridge and was wondering what I could do with it when I remembered seeing on the Food Network a deep fried chocolate ravioli.  At least, I’m pretty sure I saw it on the Food Network.  I think about food so much that sometimes I don’t know whether I’m dreaming up recipes, reading them from magazines, seeing them on T.V., or have gotten them from friends or co-workers.  The amount of time I spend thinking about food and recipes is almost obsessive.

Anyhow, I had the Ricotta and I thought that it would taste good with chocolate, then I thought about coffee and starting the experimentation.  That’s when I thought about making a coffee flavoured pasta.  The experiment didn’t go so well.  The dough was crispy and light (as fried doughs get), but I would have preferred it to be “lighter”.  I’m going to try making the same dough additional sugar, and then experiment with various other types of doughs.  The coffee flavour was overwhelming! I could barely taste the chocolate Ricotta mixture inside, and I had to dust the entire ravioli with powdered sugar because the dough tasted like I was like drinking espresso straight out of the machine. Yep, definitely add sugar and reduce the coffee flavour.  I’m also going to try to add a coolie of some sort, maybe mango or cherry? I think the dessert needs a kick to it, and some colour!  Besides, I think people would like something to dip the ravioli in (or maybe that’s just me).  There’s just something magical about dipping.  I broke open one of the ravioli’s to taste the Ricotta mixture.  It was DELICIOUS!  The melted Ricotta had a great texture, the chocolate wasn’t too strong, and the sweetness was “just right”.  I was happy that the ratio of chocolate to Ricotta worked out so well on my first try.  I’m not going to change that at all.  I’m pretty pleased with my first attempt, and am excited about the days to come 🙂

Lastly, I’m not going to post any recipes on here until I’m sure that they’re worthy of being duplicated.  With that being said, if anyone wants the “in progress” recipes, I’ll send them to you.  Just let me know!

I hope the coffee won’t affect my sleeping tonight!

Cheryl

Read Full Post »